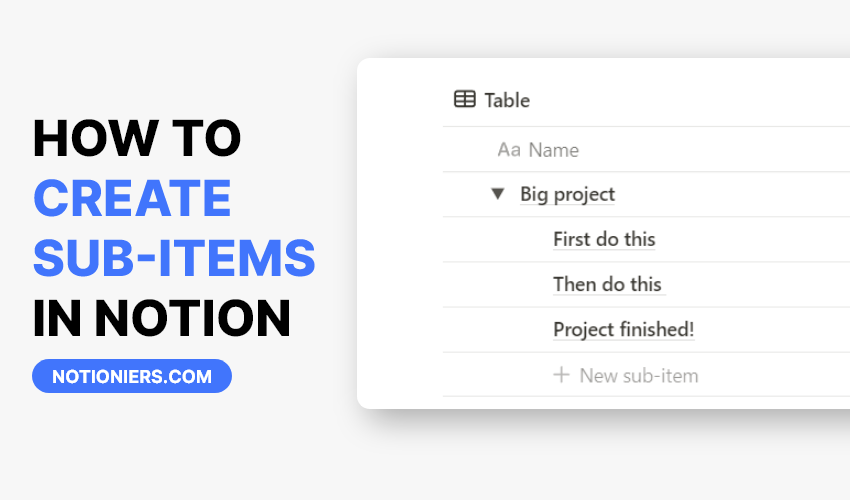
Using Sub-Items in Notion can help you break down projects into tasks. You can use this feature in various other ways too. Let’s see how to quickly add this to our Notion database.
How to enable sub-items in Notion
Step 1: Open the database view options
Open the database view options by clicking on the 3-dots icon

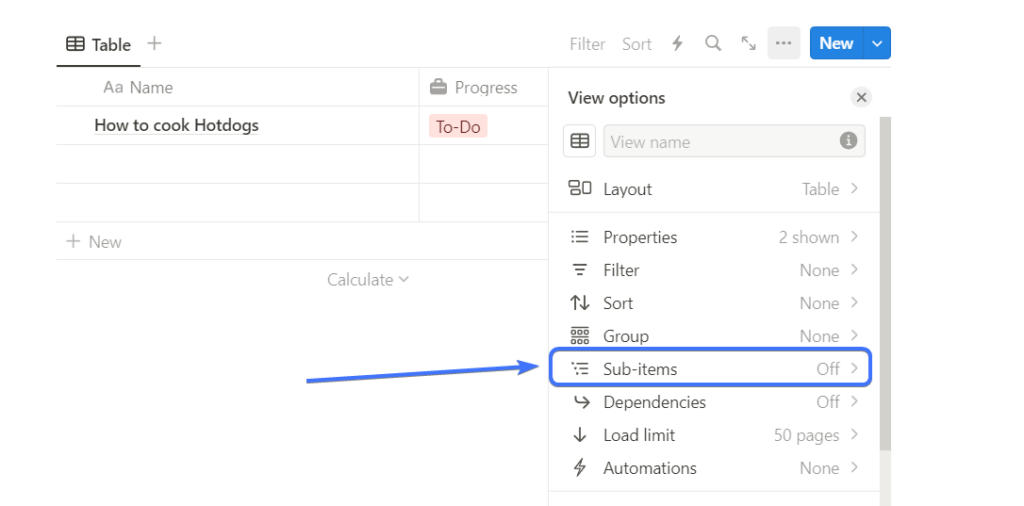
Step 2: Next go to sub-items
Click on the 5th option called “sub-items”
Step 3: Click on “Turn on sub-items”
Next, in the sub-items menu section, click on “Turn on sub-items” to enable sub-items for your database

Step 5: Add subitems to your database
Just hover over the database items and click on the triangle icon beside the name to open the sub-items list.

Now click on “Add sub-items” to add a new sub-item to that specific item.

Turning back off sub-items will result in deletion of all the sub-items of the database
Read more: Tags in Notion: Complete Guide [2024]
How to add sub-items columns in a Notion database
You can see the sub-items in a separate column to easily glance at all the subitems for each item. Here’s how to do it.
Step 1: Go to database view options
Go to database view options by clicking on the 3-dot icon.

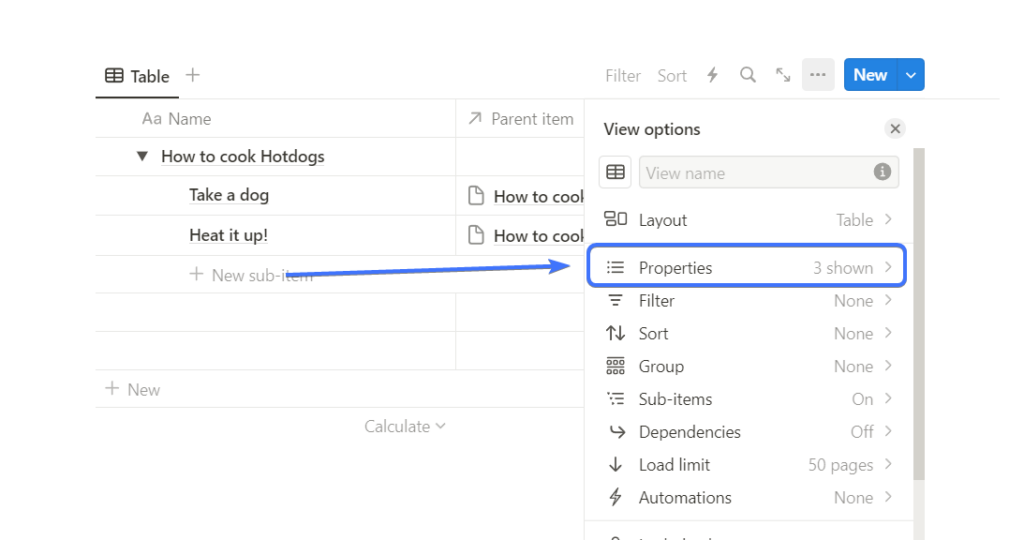
Step 2: Open the properties menu
Click on the second option to open the properties menu from the View options.
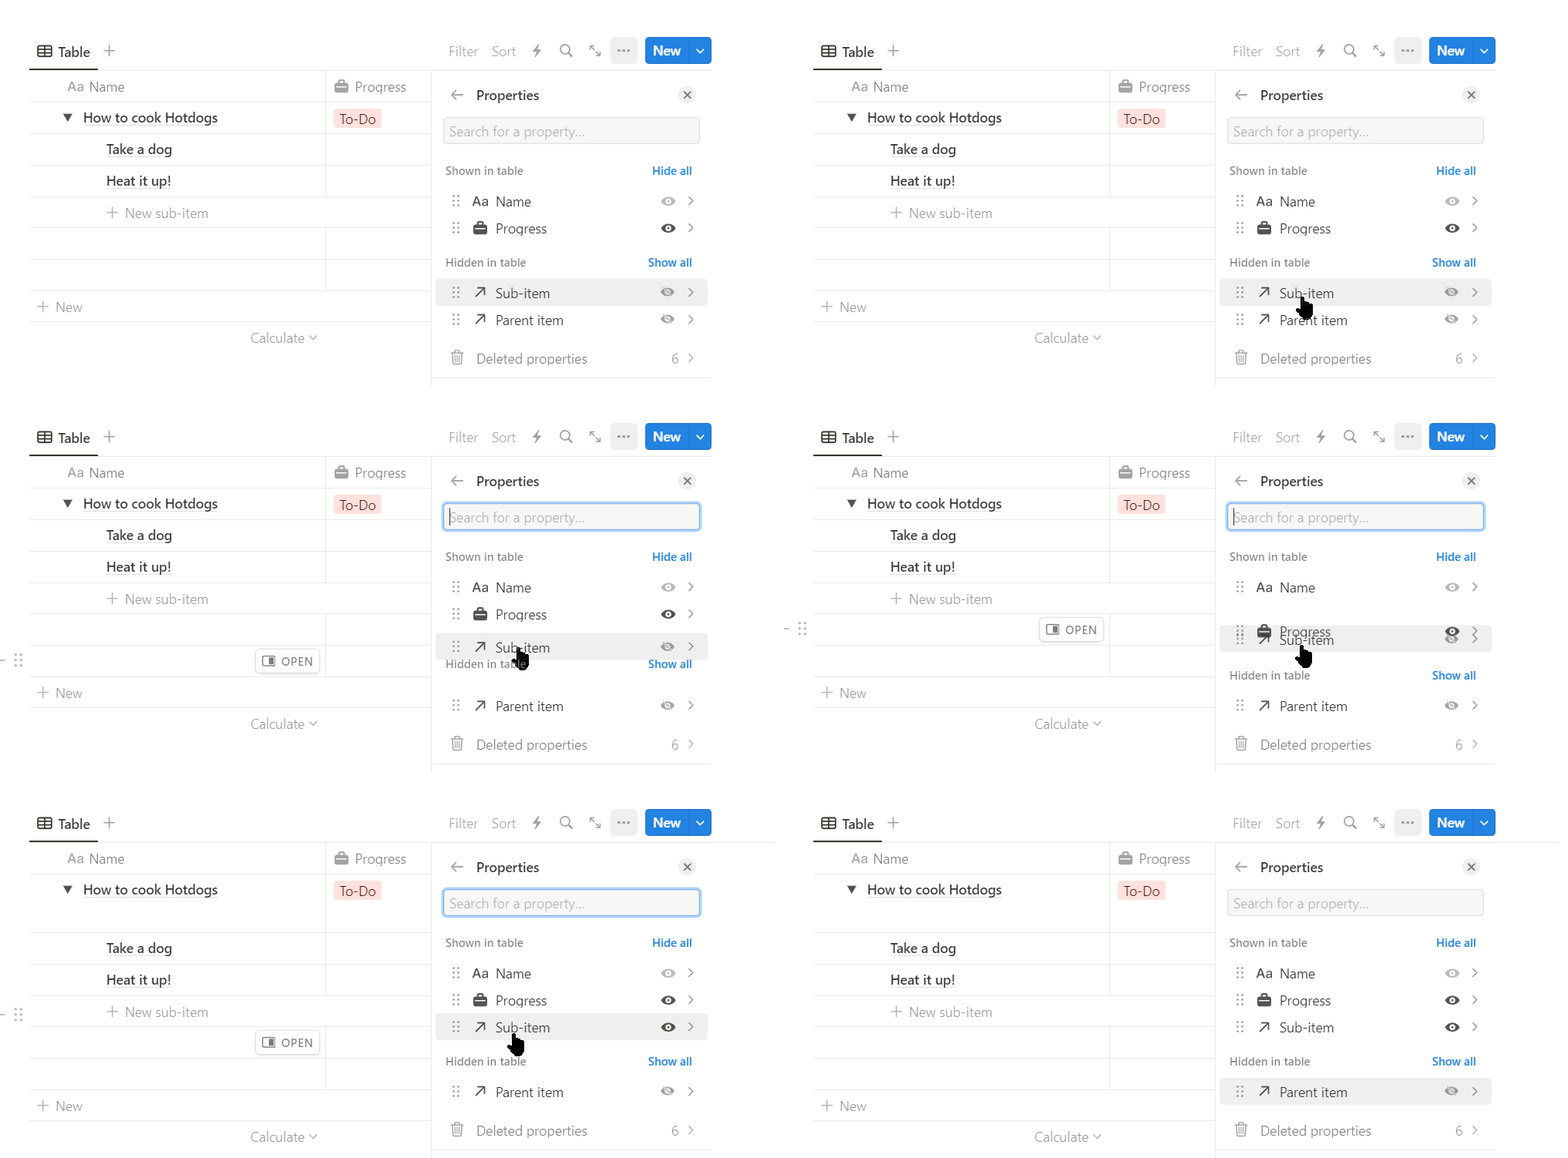
Step 3: Drag the sub-item to the “shown in the table” section
In the properties menu, there are two sections, shown in the table and hidden in the table. Just drag the sub-item column from hidden in the table to shown in the table section.
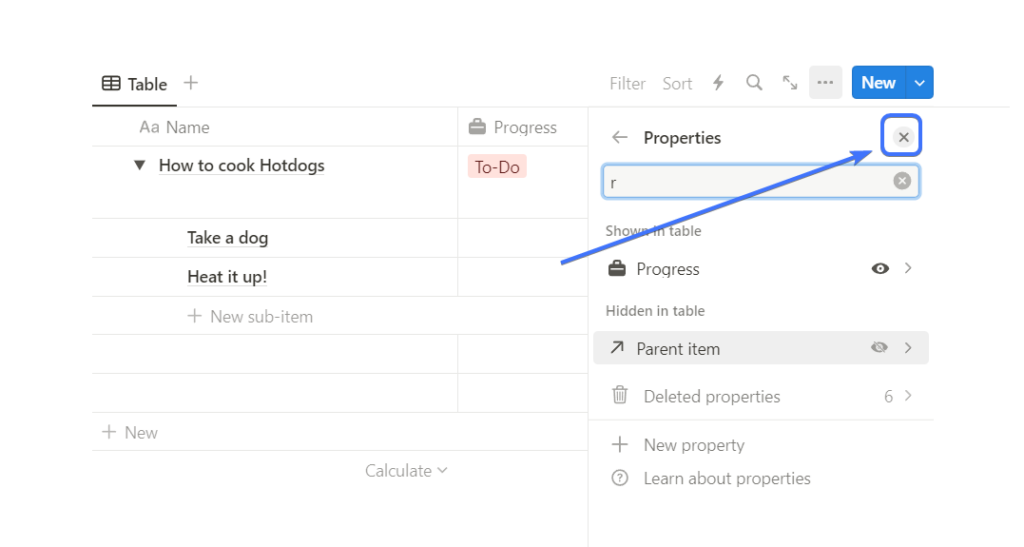
Next, click on the cross button to close the view options.
Now you can see a new sub-items column in your database

Learn more about sub-items in Notion
Conclusion
Using sub-items is a great way to organize your database. You can use the above method to easily add sub-items in Notion.


Leave a Reply