You can create columns of blocks in Notion. This will help you take much less space on your page and things will look much more organized and aesthetic. Let’s see how to do using 2 different methods.
Method – 1: Drag and Drop the block to the second column
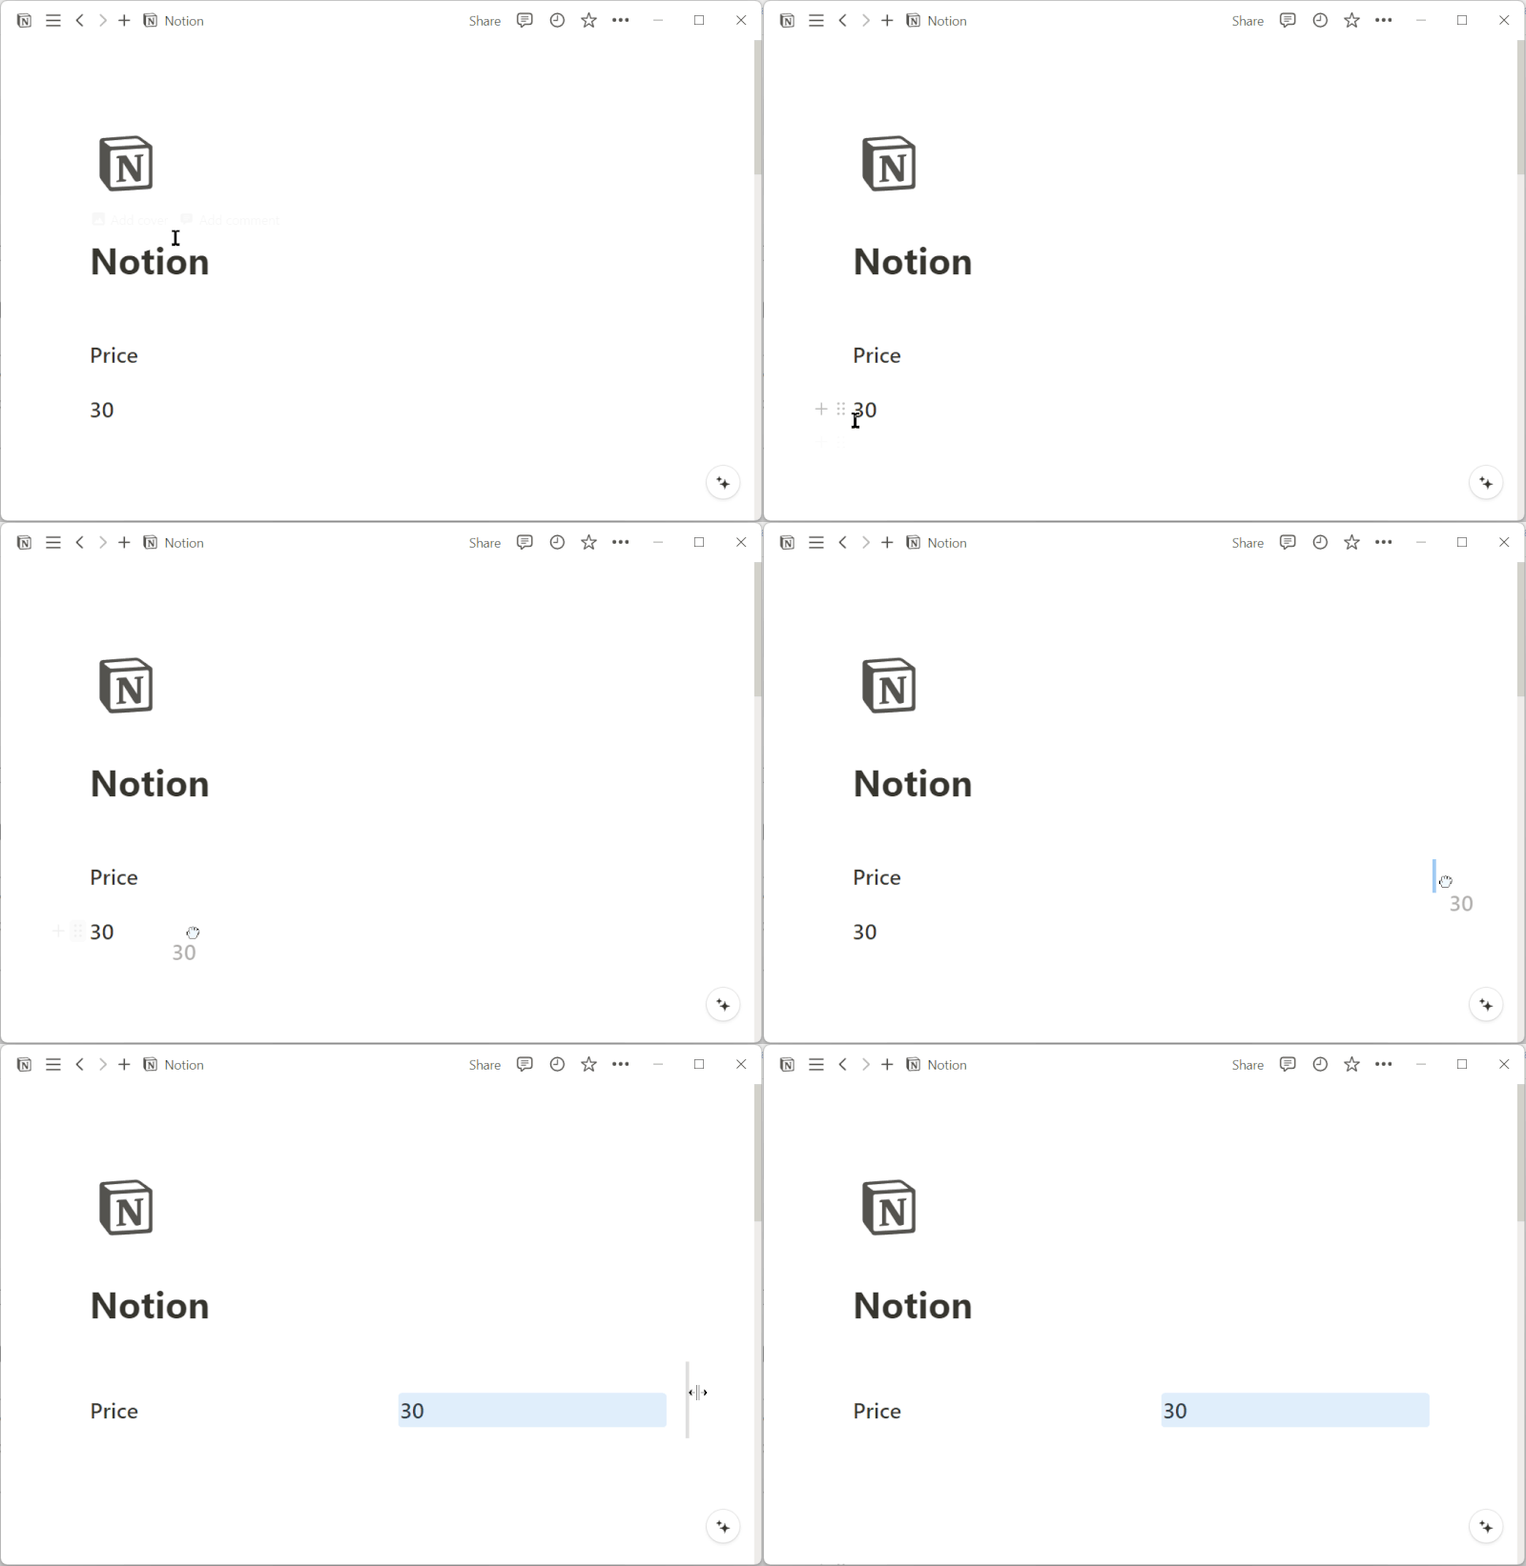
You can easily create a column of blocks in Notion by just dragging the block handle(⋮⋮) of the block to the right.
You just need to drag the block by holding the block handle(⋮⋮) you want to move the second column to the right side of the other block which you want to stay on the first column. Next, a blue bar on the right side will appear, and that’s when you can release the block.
Read further: Columns, tables, headings & dividers
You can even move an empty block to create columns.

Method – 2: Use column block
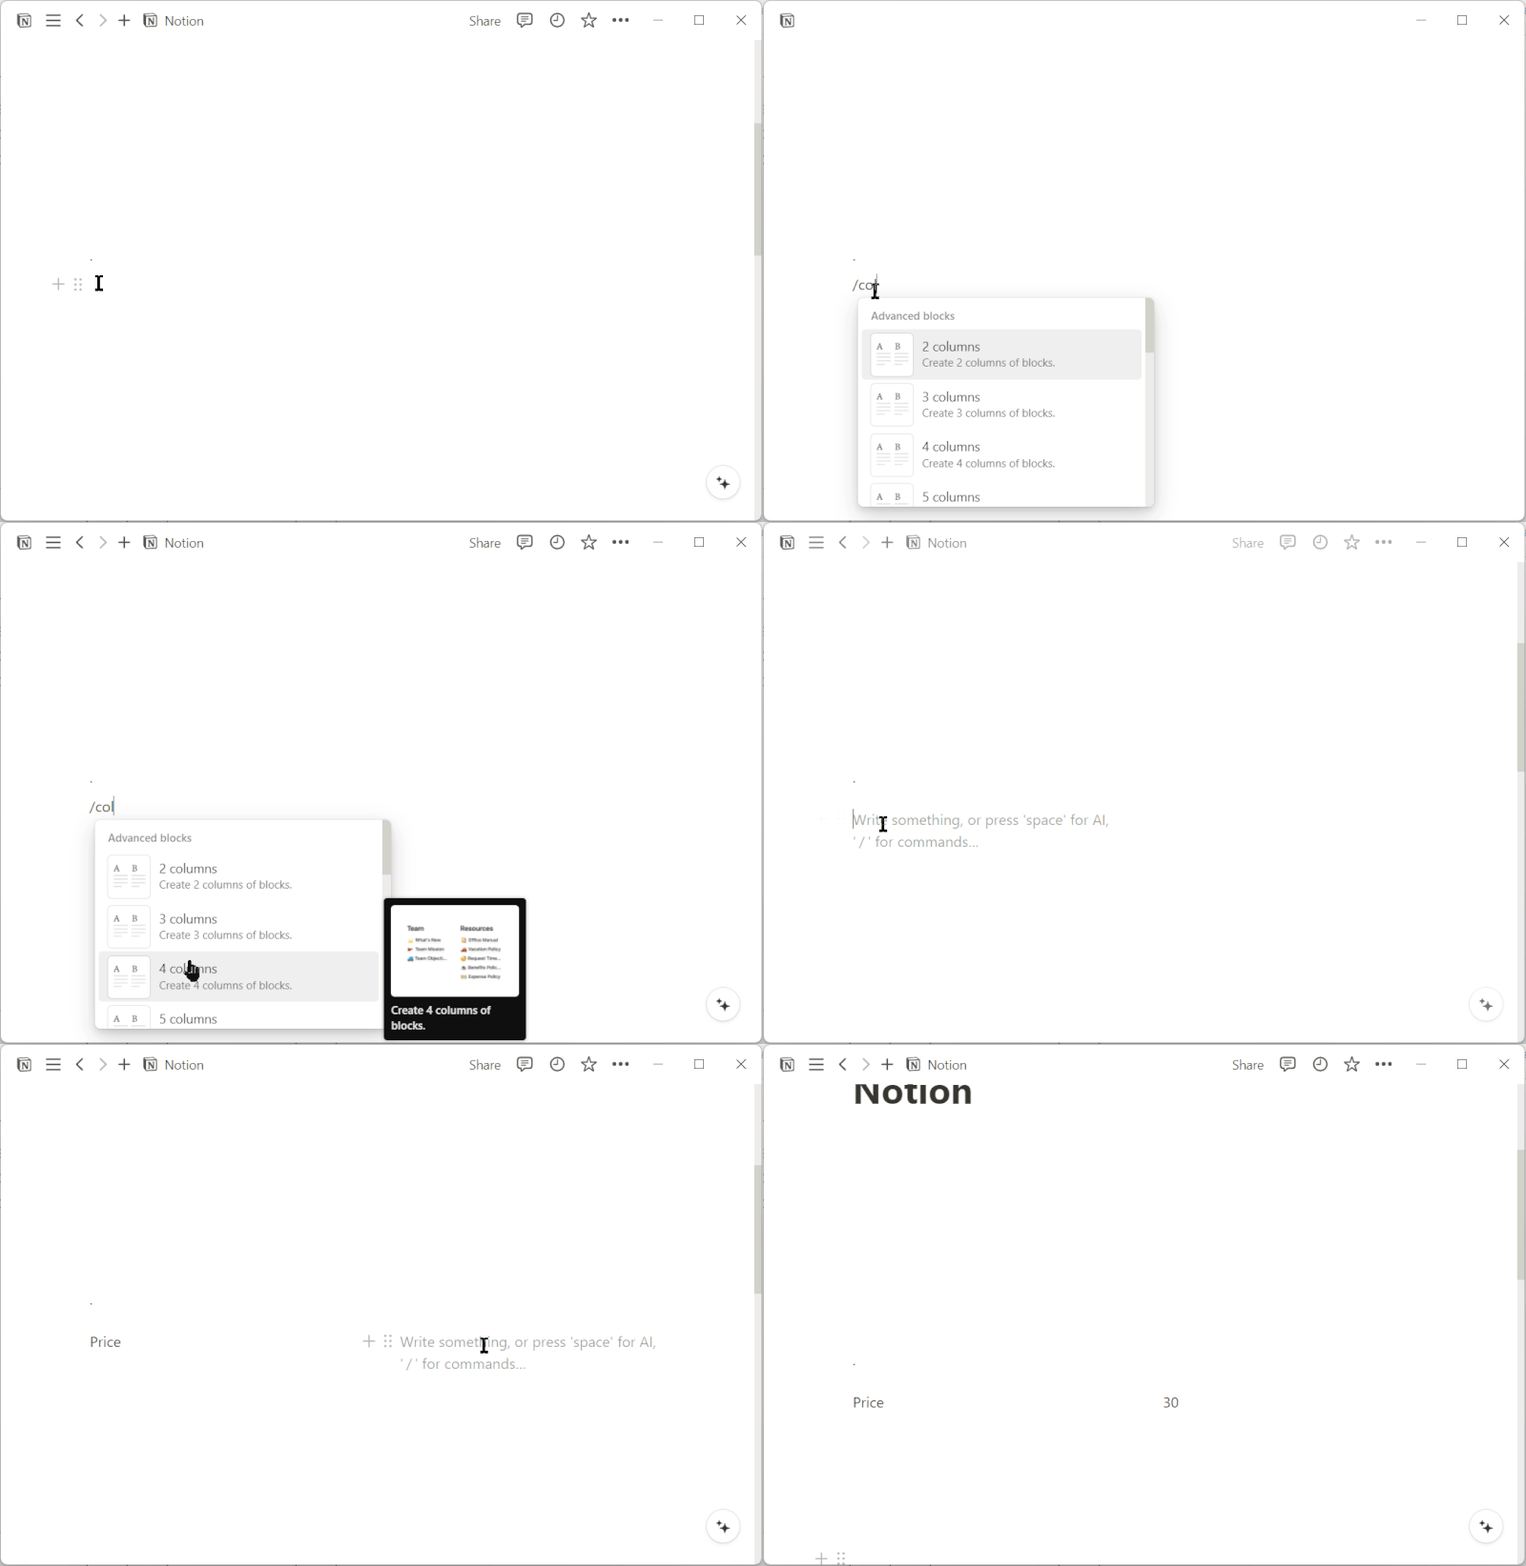
There is a column block in Notion to easily create columns. Just type “/” and type “column” and you will see “2 columns”, “3 columns” … “5 columns”. You can select the number of columns you want from these options.

Related article:
How to add Vertical Dividers in Notion [2024]
Frequently Asked Questions (FAQs)
How to put blocks side by side in Notion?
You can put block sides by using the column block in your Notion page, or by dragging the second block to the right side of the first one and leaving it when it shows a blue line.
How do you split a Notion page vertically?
You use the column block in Notion to create two sections and separate the page vertically, and then use a vertical divider to enhance the aesthetics.
Conclusion
This way, you can easily and quickly create columns in Notion.


Leave a Reply